How to Install a Toilet Seat
08 Apr 2024
How to Install a Toilet Seat
While it may not be the most glamorous DIY project, mastering the art of installing a toilet seat is a skill that will make you the unsung hero of your household. Why is it so important, you ask? Well, imagine a world without a properly installed toilet seat—a wobbly throne, if you will, where every visit becomes an adventure. But fear not, dear reader, for with a little know-how and the right tools, you'll be well on your way to achieving toilet seat nirvana.
Tools and Materials Needed
Before you embark on your quest for the perfect throne, make sure you have the following tools at your disposal:
Screwdriver: Your trusty sidekick for most toilet seat installations.
Adjustable Wrench: For those stubborn nuts and bolts.
Toilet Seat Hardware: The unsung heroes of the installation process.
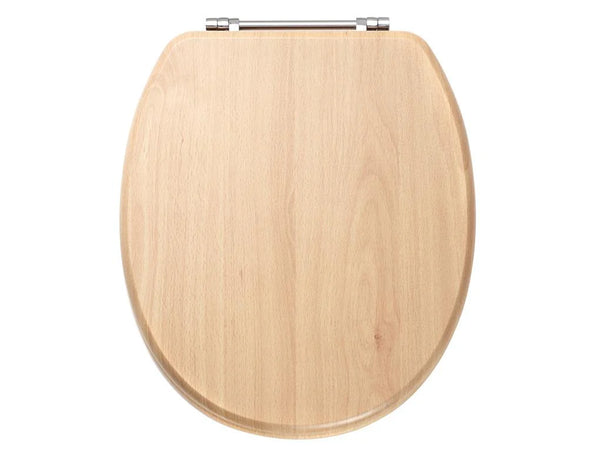
When it comes to toilet seats, the options are endless. From traditional wooden seats to high-tech bidet seats, there's something for everyone. Make sure you have the right hardware for your chosen seat to ensure a snug and secure fit.
Preparation Before Installation
Now that you've gathered your tools, it's time to prepare for the installation:
Shut off the water supply: Before you begin, it's essential to turn off the water supply to your toilet to avoid any unexpected surprises.
Cleaning the area around the toilet: A clean canvas makes for a smoother installation process. Give your toilet area a good scrub to ensure a sanitary environment for your new throne.
Removing the Old Toilet Seat
So, you've decided it's time to bid farewell to the creaky throne and usher in a new era of comfort and style. Before you can embrace the new, you must bid adieu to the old. Here's how:
Loosening and removing the nuts and bolts
Grab your trusty wrench and get ready to bid those stubborn bolts adieu! With a firm grip and a few twists, you'll have those nuts loosened in no time. Remember, patience is key here. Don't rush the process; precision pays off!
Proper disposal of the old seat
Ah, the final farewell. As you bid adieu to your faithful old seat, remember to dispose of it responsibly. Whether it's recycling or proper waste disposal, let's ensure our old friend gets a dignified send-off.
Choosing the Right Replacement Seat
So, you've decided it's time to give your throne a new crown – a shiny, sturdy, and stylish toilet seat! But wait, before you rush into the kingdom of DIY toilet seat installation, let's make sure you've got all your ducks in a row, or in this case, your bolts and nuts!
Measuring the Dimensions of the Toilet Bowl
First things first, let's measure up! Just like Cinderella's glass slipper, you want your new toilet seat to fit perfectly. Grab your measuring tape and jot down the length and width of your toilet bowl. Psst, remember to measure from the center of the seat bolt holes to the front of the bowl for accuracy.
Types of Toilet Seats Available
Now that you've got your measurements, it's time to explore the wonderful world of toilet seats. From standard to elongated, soft-close to bidet, there's a seat for every royal behind. Standard seats are your classic choice, while elongated seats offer extra comfort and space. Want to add a touch of luxury to your loo? Opt for a soft-close seat – no more accidental slamming! And for the ultimate throne upgrade, consider a bidet toilet seat for a spa-like experience right in your bathroom.
Installing the New Toilet Seat
Step 1: Gather Your Supplies
You'll need:
Toilet seat hardware: Check the package to ensure you have all the necessary screws and bolts.
Tools: A screwdriver (usually Phillips-head) is typically all you'll need.
Optional: Gloves and a disinfectant wipe for cleanliness.
Step 2: Remove the Old Seat
Unscrew the nuts holding the old seat in place and lift it off. Be sure to dispose of the old seat responsibly, and give the area a quick clean to prep for the new one.
Step 3: Align the New Seat
Position the new seat over the holes in the bowl, ensuring it's centered and aligned correctly. Take your time with this step to avoid any wonky wobbling later on.
Step 4: Secure in Place
Insert the bolts through the seat and bowl holes, then tighten the nuts underneath until snug. Be careful not to overtighten, as this could crack the porcelain.
Step 5: Test it Out!
Give your new throne a test sit to ensure it feels secure and comfortable. Adjust as needed, and voila! You're now the proud owner of a freshly installed toilet seat.
Why DIY Toilet Seat Installation?
Cost-Effective
Save some bucks by opting for toilet seat replacement and doing it yourself. No need to call in a professional when you can handle it with ease.
Customization
Explore the wide world of toilet seat types and find one that suits your style and needs perfectly. From sleek modern designs to classic wooden finishes, the options are endless.
Sense of Accomplishment
There's something satisfying about completing a home improvement project on your own. Installing a toilet seat may seem small, but it's a tangible achievement that you can enjoy every day.
FAQs
How do I know if I need to replace my toilet seat?
Is your current seat wobbly, cracked, or just downright unappealing? If so, it's probably time for an upgrade! Toilet seat replacement is a quick and easy way to spruce up your bathroom without breaking the bank.
Can I install a soft-close toilet seat on my existing toilet?
Absolutely! Say goodbye to slamming seats and hello to peace and quiet with a soft-close toilet seat. These modern marvels are designed to close gently and silently, making them a must-have for any household.
Are there different sizes of toilet seats available?
Indeed there are! Toilet seat dimensions vary, so be sure to measure your toilet bowl before making a purchase. Most seats come in standard or elongated sizes to fit a variety of commodes.
Do I need any special tools to install a toilet seat?
Not at all! DIY toilet seat installation requires only a few basic tools, such as a screwdriver and adjustable wrench. With a little elbow grease and some patience, you'll have your new seat securely in place in no time.
How tight should I tighten the nuts and bolts during installation?
Ah, the age-old question! You'll want to tighten the nuts and bolts snugly, but be careful not to overdo it. Toilet seat alignment is crucial for a proper fit, so take your time and make sure everything is lined up perfectly.


